|
Home ||
High Power Rocketry ||
Experimental Rocketry
Homemade Wire-wound Igniters
You should read Ignition and
Igniters first for how igniters work. The basic technique for making igniters is the
same whether they are for igniting recovery device charges (ejection charges) or rocket
motors. The ejection charge igniters normally must be able to be fired with low current
such as alkaline 9V batteries so are limited to higher resistance igniter (bridge) wires such
as nichrome or stainless steel but otherwise are identical to motor igniters. Motor
igniters for larger motors need added pyrogen that is ignited from the basic igniter.
This will be covered later.
| |
|
CAUTION: DO NOT USE LOW CURRENT IGNITERS FOR MOTOR IGNITION WITH A
STANDARD LAUNCH SYSTEM. Igniters intended for use for ejection charges and low
current can be fired by the continuity circuit in a standard launch system. Most
launch systems use a light bulb in series with the igniter to show that there is
continuity through the igniter. A normal motor igniter takes a fairly high
current to fire so the small current for continuity indication will not fire them.
However, igniters (electric matches) intended for ejection charges are designed to
fire with a very low current. If these are used in a motor, they can ignite when
hooking up the alligator clips and launch the rocket with your hands under the exhaust
resulting in severe burns or much worse if the motor happens to CATO. For safety
purposes, the launch system should not be connected to the battery at all when
connecting the igniter leads and until all people are at a safe distance from the
rocket. |
|
|
Pyrogen
You will need to take care of the pyrogen first because it takes
time to make and it needs to be ready when you are ready to make your igniters.
| |
| CAUTION:
EXPERIMENTING WITH PYROGENS IS DANGEROUS
DUE TO MANY UNSTABLE AND EXPLOSIVE PYROTECHNIC COMBINATIONS. STICK TO KNOWN AND
RECOMMENDED MIXTURES, ESPECIALLY BLACK POWDER. |
|
|
NC Lacquer
Most all pyrogens use NC lacquer and mix the ignition powder
into it. NC stands for nitrocellulose which is what smokeless gunpowder is made from.
As a side note, the majority of modern smokeless gunpowders also have TNT (trinitrotoluene) in
them. NC lacquer has been used as a high end lacquer for fine furniture and fine music
instruments.
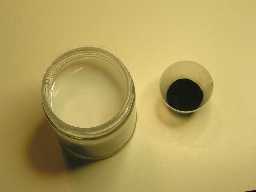
NC lacquer is very easy to make. All you need is acetone
that you can get from any hardware store and Ping-Pong balls. Ping-Pong balls are almost
100% nitrocellulose. Technically, they are celluloid which is nitrocellulose, camphor
and some other ingredients in very small quantities but they are pure enough nitrocellulose
for our purposes. There has not been found any substitute that has the same bounce
characteristics. Old movie film was also made from celluloid.
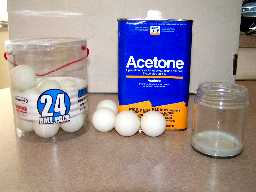 The
formula is six pingpong and eight ounces of acetone. Or three pingpong balls and four
ounces of acetone, etc. Duh! The
formula is six pingpong and eight ounces of acetone. Or three pingpong balls and four
ounces of acetone, etc. Duh!
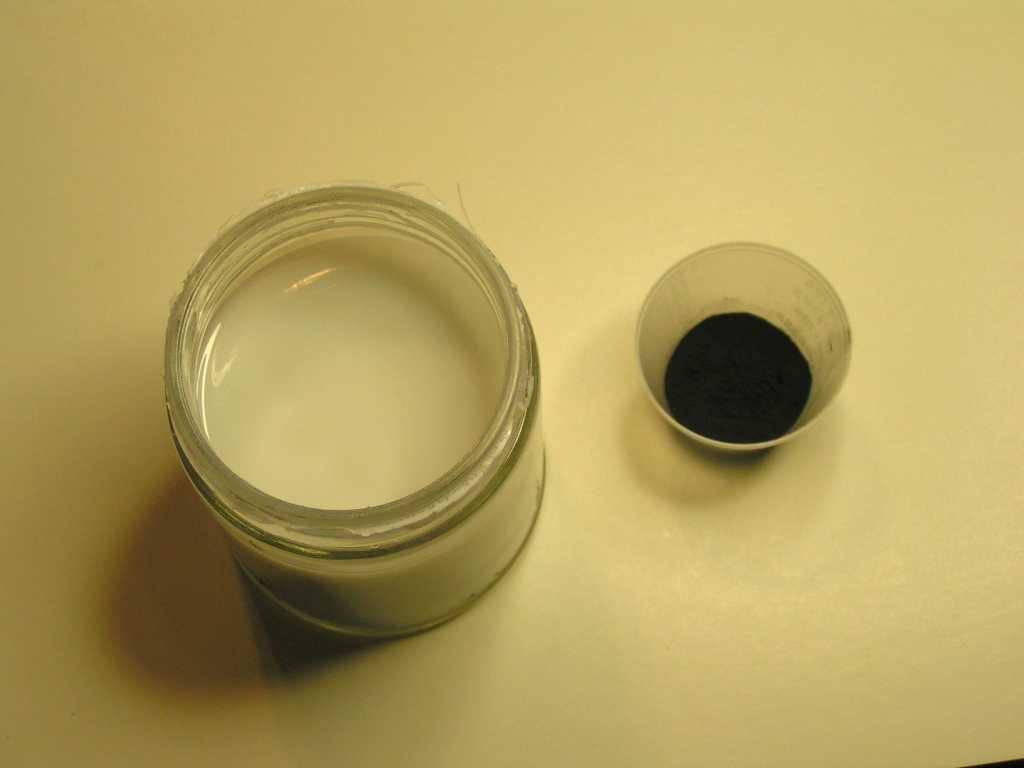
Just put the acetone in a glass jar and cut up the ping pong
balls into small enough pieces so when you put them in the acetone in the jar, the pieces are
covered.
It is six balls, not four as you see on the counter in the
picture. Two rolled off onto the floor.
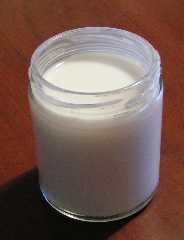 The jar in the
picture is a little too small but it was what I had made the last batch in so I decided to use
it again. There is a little left in the bottom of the jar in the picture and it is
hardened. If you don't seal the jar tight, over time, the acetone evaporates and just
leaves the celluloid. It will re-dissolve but a thicker mass like that takes longer. The jar in the
picture is a little too small but it was what I had made the last batch in so I decided to use
it again. There is a little left in the bottom of the jar in the picture and it is
hardened. If you don't seal the jar tight, over time, the acetone evaporates and just
leaves the celluloid. It will re-dissolve but a thicker mass like that takes longer.
The dissolving process with the cut up balls will take a day to
dissolve more or less. They get nice and gooey within minutes but to completely dissolve
into a nice smooth paint-like consistency will take overnight. I just put the lid on and
set it out where I will walk by it frequently and everytime I walk by, I shake it up and by
the next day, it is ready.
When it is ready, you could mistake it both in color and
consistency for Elmer's glue, except for the smell.
Black powder
 Finely
ground black powder, called meal powder, is what I use for the pyrogen and will work in
all configurations in my experience. You can either make it yourself, which is what I
do, or you can use commercial black powder. You have to have potassium nitrate to make
sugar fuel anyway so you should already have some. Sulfur can still usually be obtained
in 4oz bottles from drug stores and charcoal can be picked out of your wood stove or bought
through chemical suppliers. You can usually get large bags of mesquite charcoal in the
spring and summer for BBQ's and it makes great charcoal. Finely
ground black powder, called meal powder, is what I use for the pyrogen and will work in
all configurations in my experience. You can either make it yourself, which is what I
do, or you can use commercial black powder. You have to have potassium nitrate to make
sugar fuel anyway so you should already have some. Sulfur can still usually be obtained
in 4oz bottles from drug stores and charcoal can be picked out of your wood stove or bought
through chemical suppliers. You can usually get large bags of mesquite charcoal in the
spring and summer for BBQ's and it makes great charcoal.
 Don't
use charcoal briquettes because of the binder in them. Grind the ingredients separately
75% potassium nitrate, 15% charcoal, 10% sulfur in a coffee grinder, blender, or best is a
ball mill. See the black powder and grinding paragraphs on the
propellant page. Also see how to make black powder in the
free 1979 manual. Don't forget to wet homemade black
powder and dry it again to get to full potency. Don't
use charcoal briquettes because of the binder in them. Grind the ingredients separately
75% potassium nitrate, 15% charcoal, 10% sulfur in a coffee grinder, blender, or best is a
ball mill. See the black powder and grinding paragraphs on the
propellant page. Also see how to make black powder in the
free 1979 manual. Don't forget to wet homemade black
powder and dry it again to get to full potency.
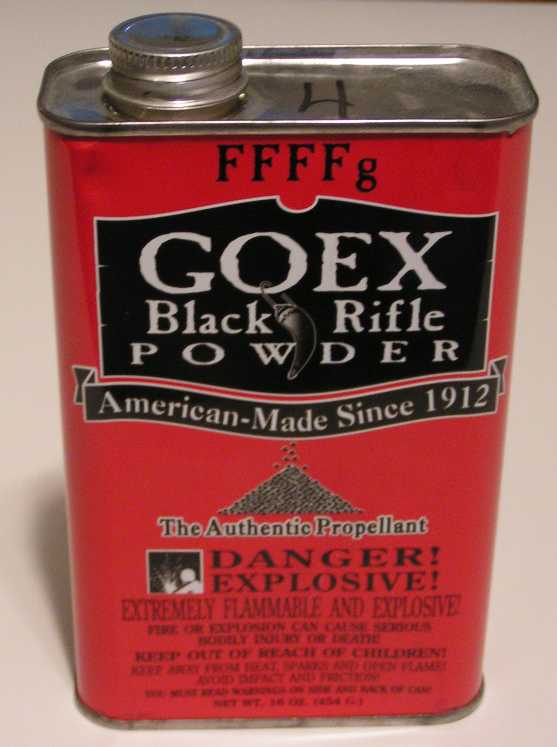
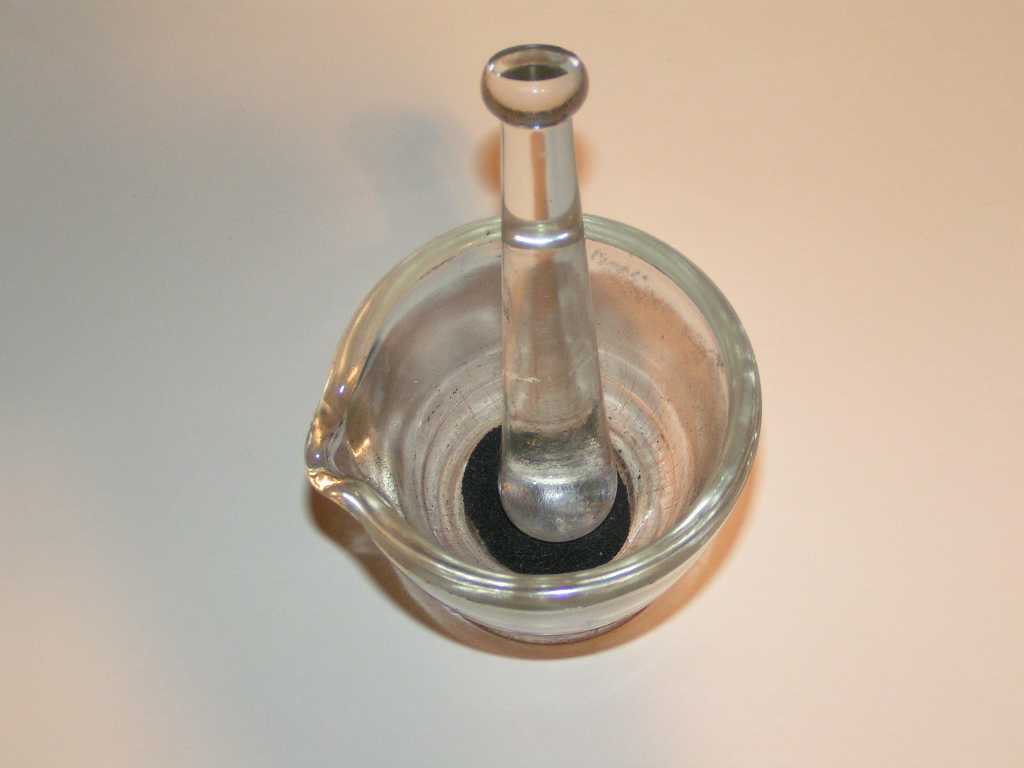
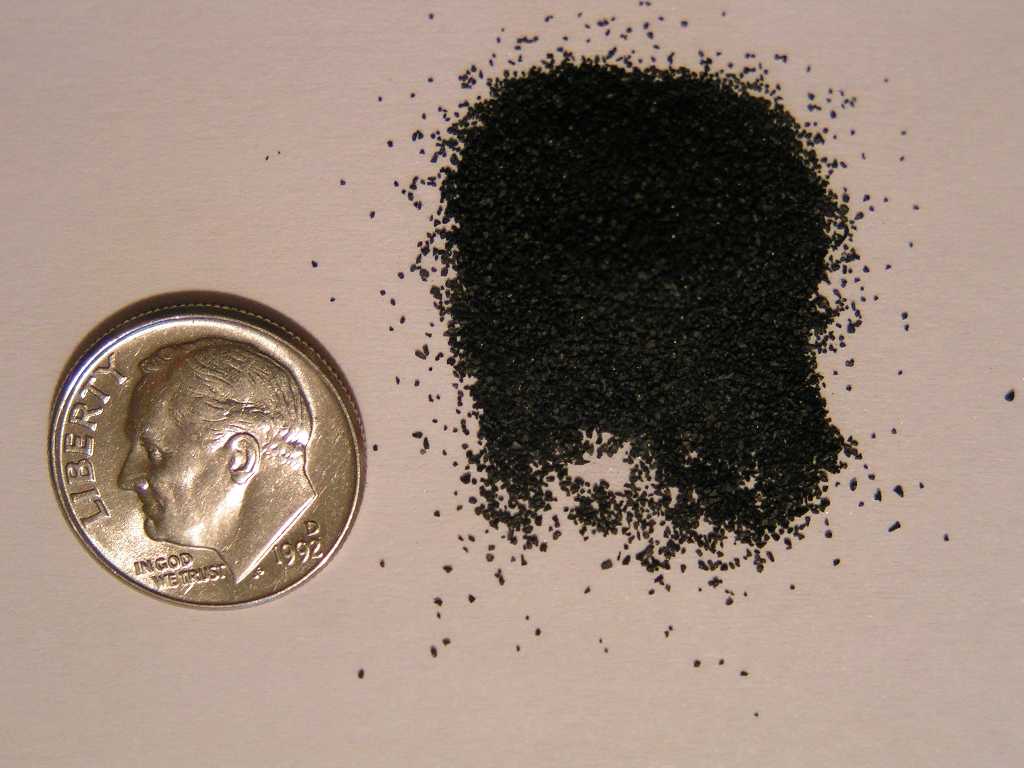
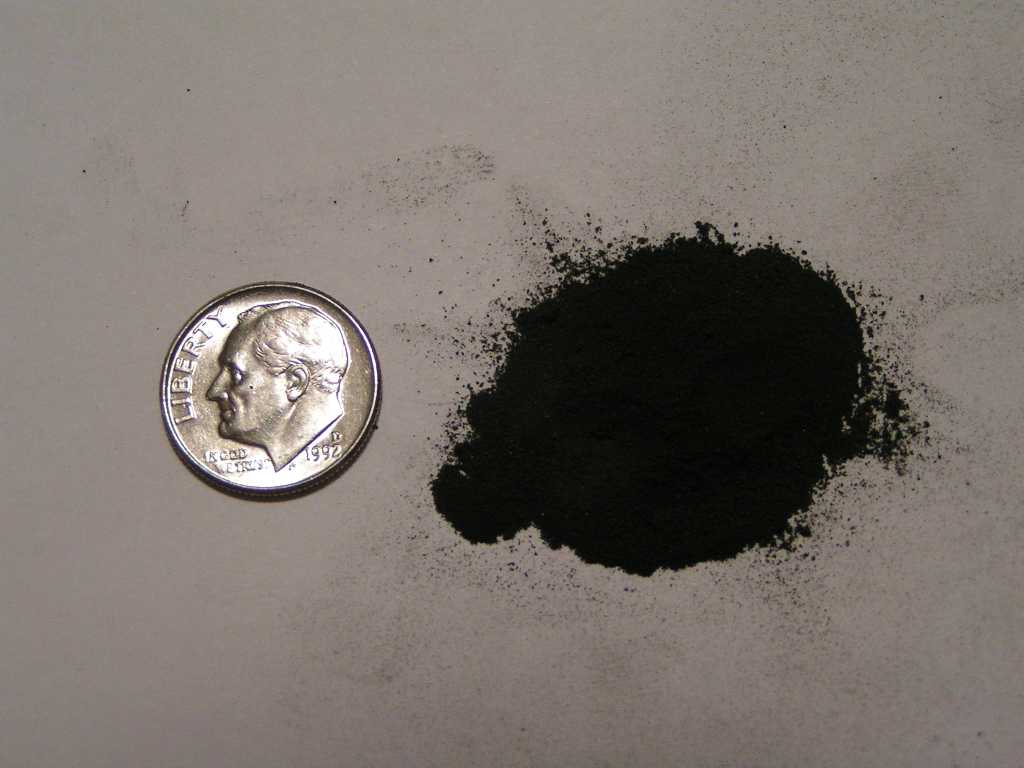
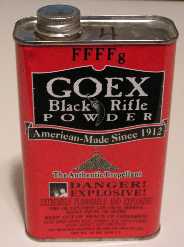
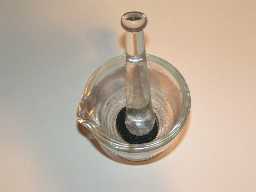
You can also use any grade of commercial black powder and
grind it in a mortar and pestle. (4F shown above left in can, lower left before grinding,
lower right after grinding)
 Don't grind black
powder in a coffee mill and only grind small quantities at a time. It is VERY flammable
and will burn in a flash. Commercial black powder grinds to a fine powder very easily in
a mortar and pestle. Don't grind black
powder in a coffee mill and only grind small quantities at a time. It is VERY flammable
and will burn in a flash. Commercial black powder grinds to a fine powder very easily in
a mortar and pestle.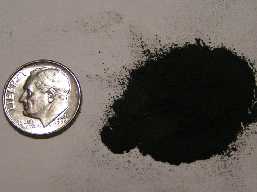
Black powder ignites very easily and burns fast. It will
ignite from all wire wrapped igniters whether the igniter wire (bridge wire) is copper,
stainless steel, or nichrome. It will also ignite dependably in Christmas tree light
igniters
Keep all black powder in closed containers with screw-on lids so
if it is dropped, it won't spill out.
RESPECT all pyrogen powders. They are
sensitive, catch fire easily, and when burning cannot be extinguished with fire extinguishers
which is the case for all rocket fuels, also. Black powder is referred to as an
explosive by the BATF.
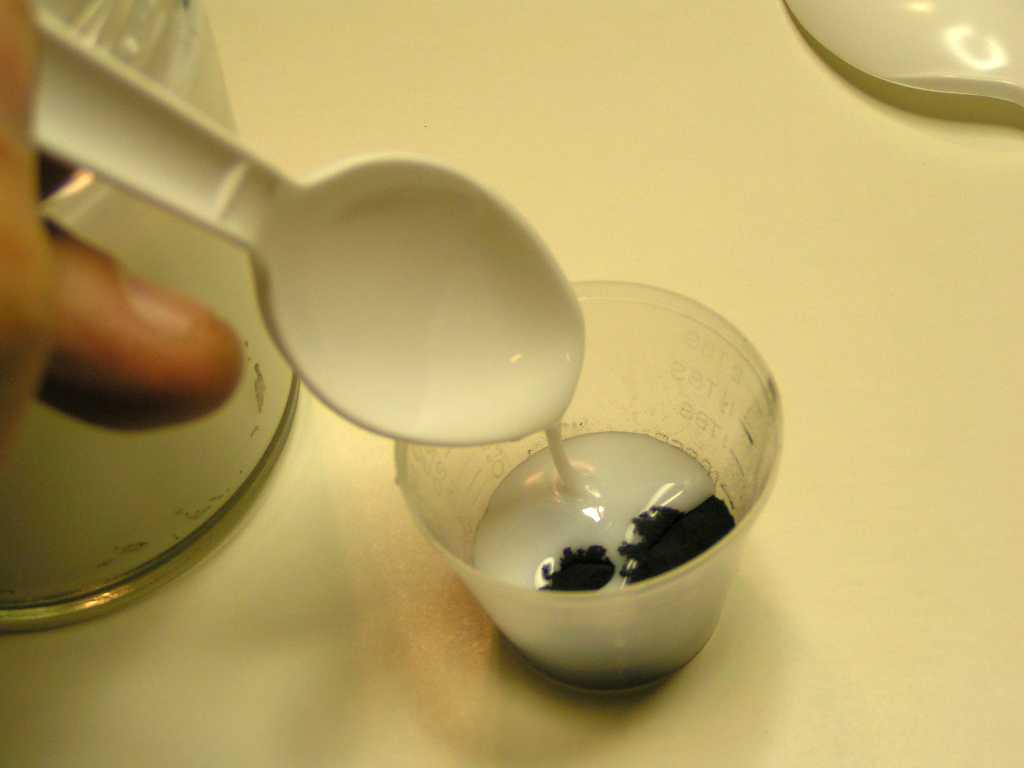
Mixing the Pyrogen
 The
pyrogen ready for dipping is made simply by mixing some meal powder in some NC lacquer or vice
versa. I like to use little two tablespoon (30 ml) cups like come on cough syrup bottles
and also available at hobby stores. These little plastic cups are inexpensive,
disposable, and just the right size for mixing small quantities of things like epoxy when
building rockets. The
pyrogen ready for dipping is made simply by mixing some meal powder in some NC lacquer or vice
versa. I like to use little two tablespoon (30 ml) cups like come on cough syrup bottles
and also available at hobby stores. These little plastic cups are inexpensive,
disposable, and just the right size for mixing small quantities of things like epoxy when
building rockets.
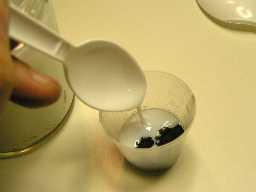 There is no
specific ratio. just put some black powder in the mixing container and add a little NC lacquer
until it is slurry consistency and sticks to the igniter wire tip when dipped. You can
thin it with more lacquer or thicken it with more black powder. If your lacquer is too
thick, you can thin it with more acetone. An eye dropper or hypodermic syringe is good
for adding small amounts of acetone. There is no
specific ratio. just put some black powder in the mixing container and add a little NC lacquer
until it is slurry consistency and sticks to the igniter wire tip when dipped. You can
thin it with more lacquer or thicken it with more black powder. If your lacquer is too
thick, you can thin it with more acetone. An eye dropper or hypodermic syringe is good
for adding small amounts of acetone.
Note: Don't just try adding water to the black powder to
make the pyrogen. It only works...kind of. It doesn't stick well to the igniter
wire and is very brittle and can break off easily. I did this until I read about NC
lacquer and when I switched to that, boy was I excited. The very difficult job of
getting the black powder to stick was then made into a slick and easy process of just dipping.
The Lead Wire
A popular wire for lead wire (that is like to lead a horse,
not like the heavy metal) is 22 gage 2-conductor pvc insulating solid copper wire often
referred to as shooters wire Any similar wire will work but some definitely work better
than others. Solid copper wire is definitely best and PVC insulation is definitely
better than Teflon and similar types. Teflon (TFE or PTFE) is harder, slicker, and
shinier than PVC and doesn't tend to stay bent as well as pvc covered. Twisted pairs
work just as well as two conductor lamp cord type wire. I have used both and prefer the
lamp cord style slightly over the twisted pair but there isn't much difference to me.
You can also use stranded wire but it isn't as easy to work with for two reasons. First,
it is easier if when you bend it, it stays bent to some degree. Solid wire does.
Second, solid wire is easier to wrap with the igniter wire. If you use stranded wire, it
is best to twist the wire after removing the insulation and tinning it (melt some solder onto
it). Keep in mind the nozzle throat diameter (on small motors) and the ejection charge
canister hole size and make sure your lead wire will go through them. You can also use
single conductor solid wire and twist two together but it is more work and more time
consuming. It is also very hard to get teflon covered stranded wire to stay twisted.
They untwist themselves and so have to have tape put around the end after twisting to prevent
this. Just stay away from Teflon coated wire, it really just isn't worth the trouble.
In the case of lead wire, cheaper is actually better. You shouldn't have to pay more
than 4¢ to 8¢ per foot. I have heard you can get it for around 4¢ from Lowes or they can order
it for you but many people get it from rocketry or pyrotechnic suppliers.
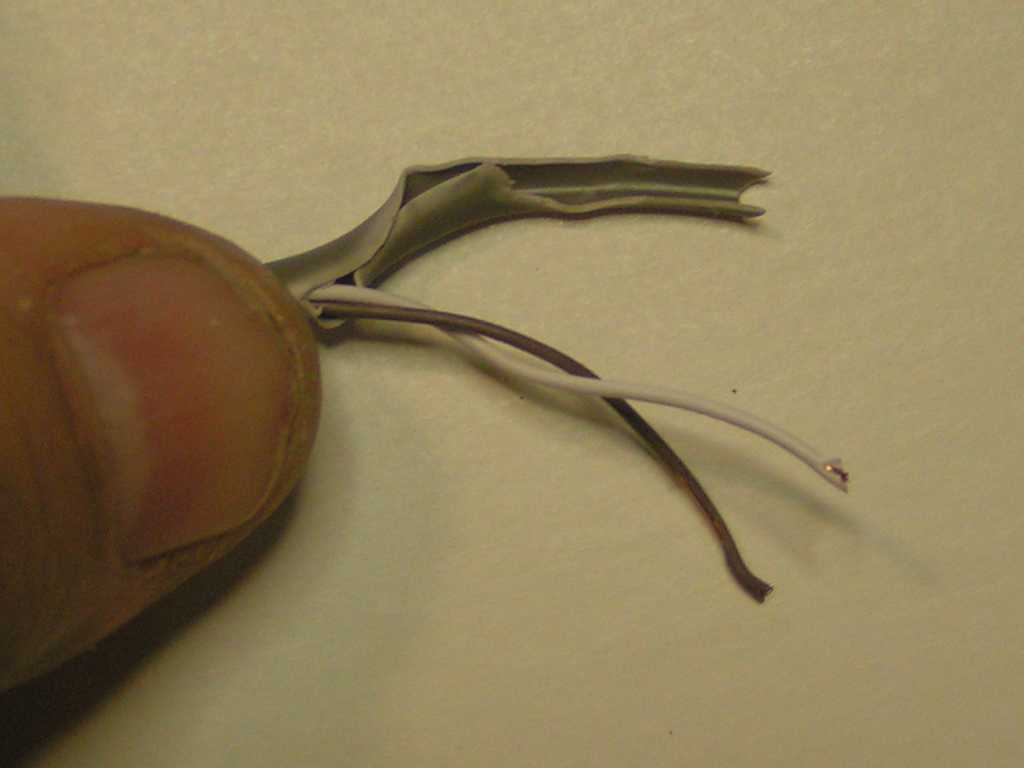
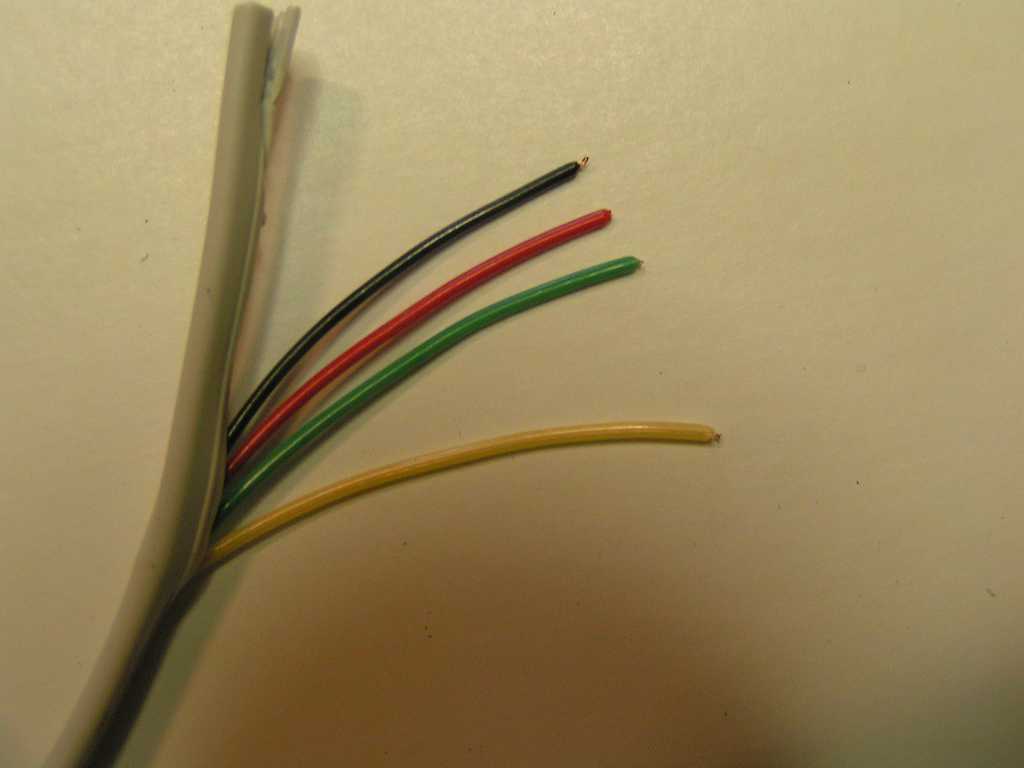
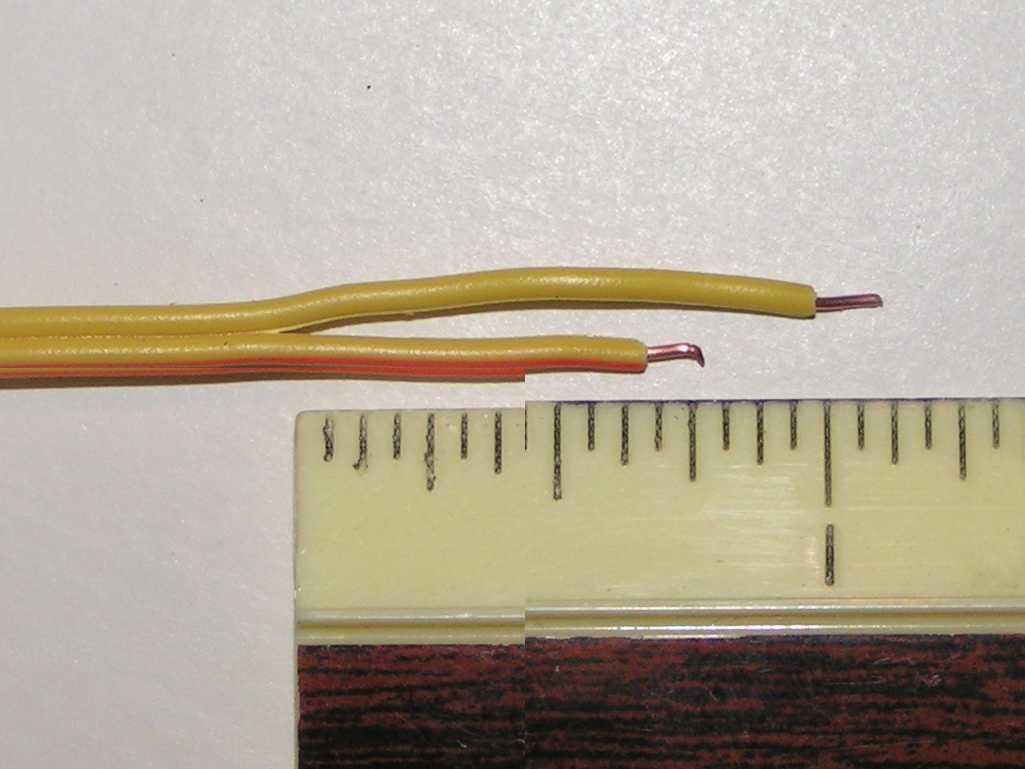
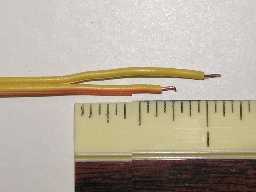
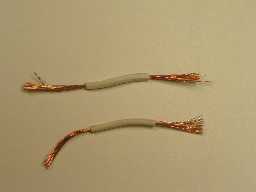
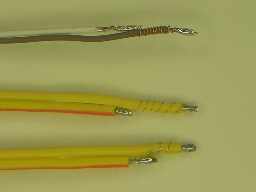
Below left is 22 gage shooters wire (yellow) along with standard
18 gage lamp cord (white). Center is a twisted pair of solid copper wire with an outer
cover. This is what I used for a long time before I got the shooters wire. It is
actually about the same size as the shooters wire. I have no idea where I got it, just
something in my collected wire box. Right is four conductor phone wire. These
wires are parallel, not twisted, Teflon coated, and stranded. This is about the ultimate
in undesirable other than the size is about right. For examples for this page, I made
igniters out of each of these three.
Cut to length. Once you have your wire selected and
available, cut it into lengths depending on its use. It will probably be between 8" and
24" in length. It is a lot easier if you do a batch, cutting twenty or thirty at a time
or whatever you want.
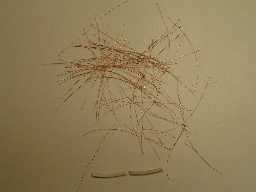
Separate, shorten, strip. Use your finger nail or a
knife to separate twin lead wire and separate it back about an inch or so. Cut one of
the wires 5/16" shorter than the other. Then strip 3/32" of the insulation off the ends
of both wires.
The Igniter Wire (Bridge Wire)
The igniter wire, also called the bridge wire, is the part that
gets hot and ignites the pyrogen. It has to be a small diameter by comparison to the
lead wire. If the igniter is to be used with a 9V alkaline battery or similar with
an onboard altimeter or timer, I recommend 40 gage nichrome wire. 40 gage stainless
steel ribbon (available from
aeroconsystems.com) can also be used but is difficult to solder and has a lower resistance
and so is not quite as good, though much cheaper.
If the igniter is to be used for igniting motors with a 12V car
battery, then you need something that takes more current and will not ignite with the
continuity circuit of a standard launch system. You can use a larger diameter nichrome
wire like 34 gauge but I like to use copper strands as described and shown below.
  If
you want the cheapest and most readily available igniter wire for use with a 12V car battery,
you can use strands from stranded lamp cord such as the 18 gage lamp cord shown above with the
shooters wire. Cut the cord into 2-1/2" lengths and strip the insulation off. The
best way is to strip about 3/4" off both ends and then bull a few strands out. Then you
can pull the rest out. The wire in the picture has 33 strands and since it is
two-conductor, one piece provides 66 igniter wires – way more than enough igniter wires for
one batch. It measures out to be about 39 gage. An interesting note is that the
number of strands in any stranded wire or cable is almost always a prime number. It is
because of the way they most efficiently lie in a circle or concentric circles. If
you want the cheapest and most readily available igniter wire for use with a 12V car battery,
you can use strands from stranded lamp cord such as the 18 gage lamp cord shown above with the
shooters wire. Cut the cord into 2-1/2" lengths and strip the insulation off. The
best way is to strip about 3/4" off both ends and then bull a few strands out. Then you
can pull the rest out. The wire in the picture has 33 strands and since it is
two-conductor, one piece provides 66 igniter wires – way more than enough igniter wires for
one batch. It measures out to be about 39 gage. An interesting note is that the
number of strands in any stranded wire or cable is almost always a prime number. It is
because of the way they most efficiently lie in a circle or concentric circles.
If you use nichrome or stainless wire, you can cut the wire in
2-1/2" pieces like above but I actually find it easier to work with it in long pieces or just
unwound a couple feet off the spool and cut it off when you finish each one.
Wrapping and Soldering the
Igniter Wire
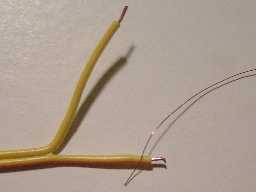 |
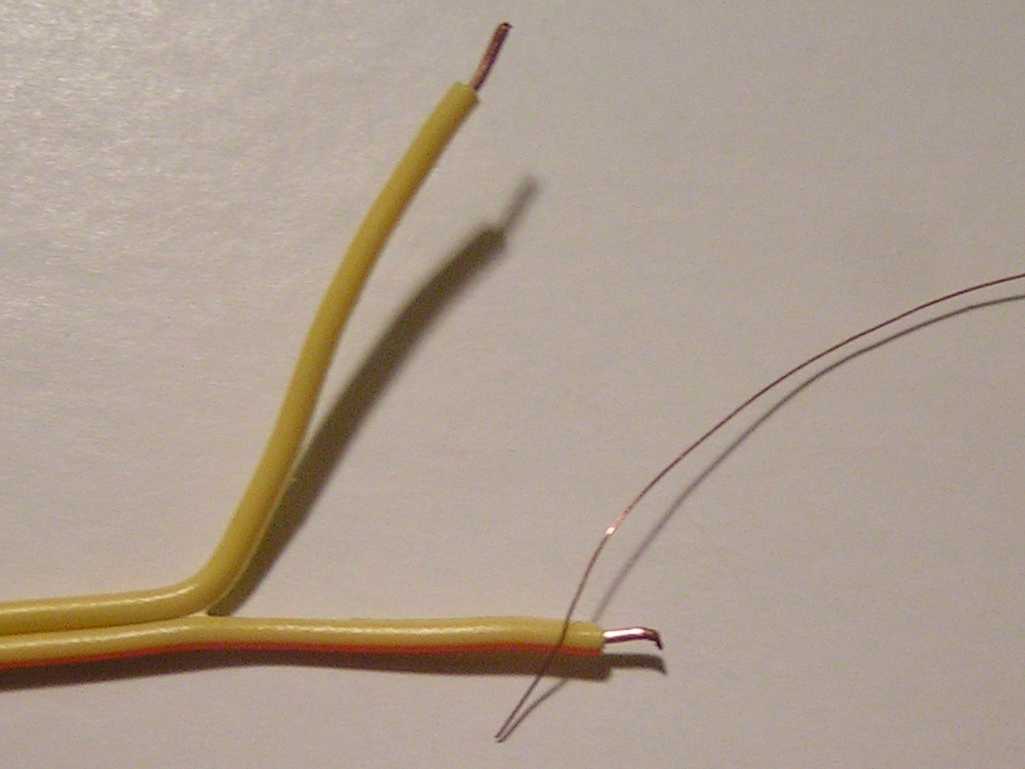
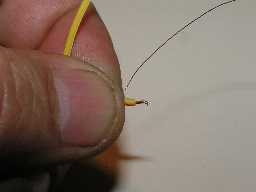
Left: Spread the two leads apart. Lay the
igniter wire across the shorter lead wire as shown.
Right: Grasp the igniter wire and lead wire between
your thumb and index finger as shown with your left hadn (if you are right handed, other
wise the opposite.)
|
 |
 |
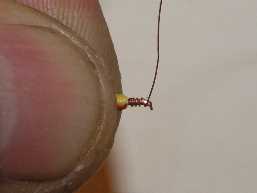
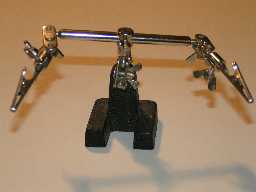
Left:
With your other hand, wrap three or four wraps of igniter wire around the bare end of the
short wire.
Right:
Here is where you need a third hand. I have had this for years but I assume they are
still made. You could probably just screw an alligator clip to a piece of upright
2X4 and it would work fine, too.
|
 |
| |
|
|
  You
need to hold the lead wire in one hand, the solder in the other, and the soldering iron in a
third hand. So, use the third hand to clamp the lead wire, then you can use both your
real hands to manipulate the soldering iron and solder. I use a digital temperature
controlled soldering iron but that is because I just requested it as a really neat thing I
wouldn't buy for myself one Christmas. A standard pencil type soldering iron works fine.
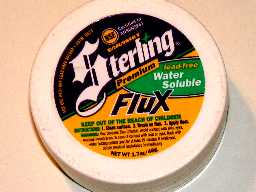
Use a very small gauge solder -- rosin core for copper, acid core for stainless steel, and no
core plus zinc chloride solder flux for nichrome. Actually, I just used the rosin core
but let the rosin burn off. When using the flux, heat the area to be soldered first with
the soldering iron, then dip it into the flux, then solder. If you don't have experience
soldering, you don't need much heat or solder on this small wire. Heat the wire with the
soldering iron then touch the solder to the wire. When the wire is hot enough (410 °F
works good if you are lucky enough to have a temperature controlled soldering station like
mine) the solder will melt and flow right onto the wire covering the igniter wire wrapped
around the bear lead wire. You
need to hold the lead wire in one hand, the solder in the other, and the soldering iron in a
third hand. So, use the third hand to clamp the lead wire, then you can use both your
real hands to manipulate the soldering iron and solder. I use a digital temperature
controlled soldering iron but that is because I just requested it as a really neat thing I
wouldn't buy for myself one Christmas. A standard pencil type soldering iron works fine.
Use a very small gauge solder -- rosin core for copper, acid core for stainless steel, and no
core plus zinc chloride solder flux for nichrome. Actually, I just used the rosin core
but let the rosin burn off. When using the flux, heat the area to be soldered first with
the soldering iron, then dip it into the flux, then solder. If you don't have experience
soldering, you don't need much heat or solder on this small wire. Heat the wire with the
soldering iron then touch the solder to the wire. When the wire is hot enough (410 °F
works good if you are lucky enough to have a temperature controlled soldering station like
mine) the solder will melt and flow right onto the wire covering the igniter wire wrapped
around the bear lead wire.
| |
|
|
 |
The solder
joint should look like this when you get done. Don't worry if it isn't perfect.
As you will see below, not all of mine look so nice either. Sometimes I get in a
hurry and then I usually get too much solder on. The main thing is to get the two
soldered together. Why solder at all? I'll answer that below. Note the
straggling pice of wire to the left in the picture. That can be clipped off at this
point or after both are soldered together. |
| |
|
 |
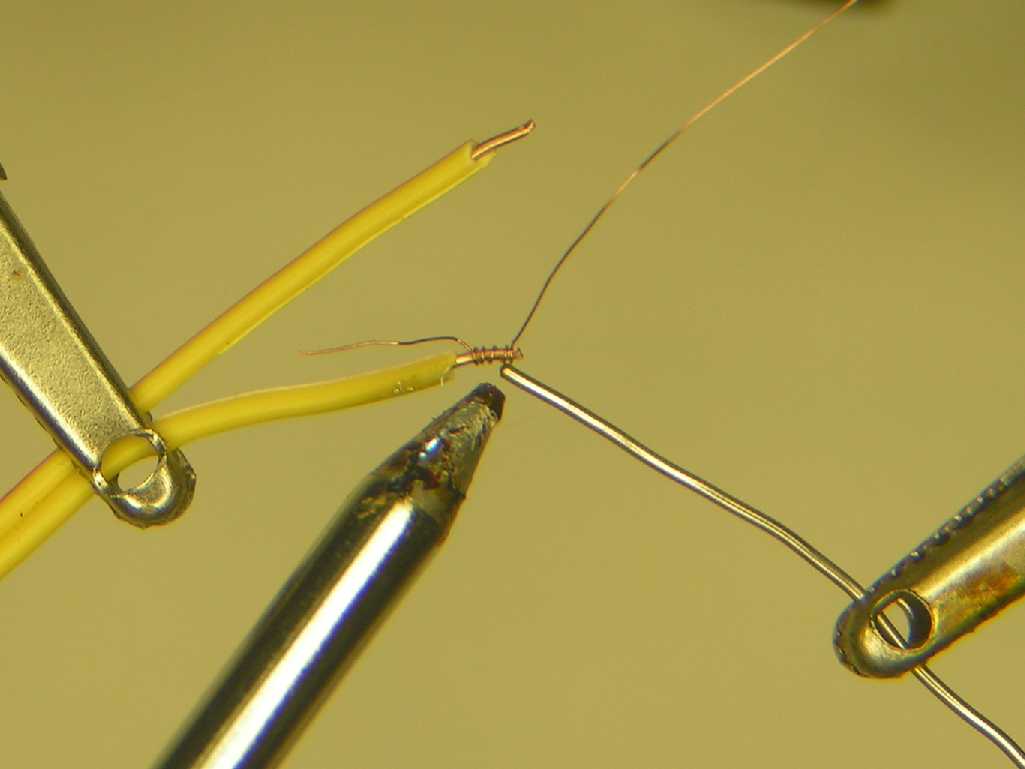
Next, push the
two lead wires together and wrap the end of the ignition wire around the insulated part of
thelonger lead and then onto the bare part of that wire |
| |
|
 |
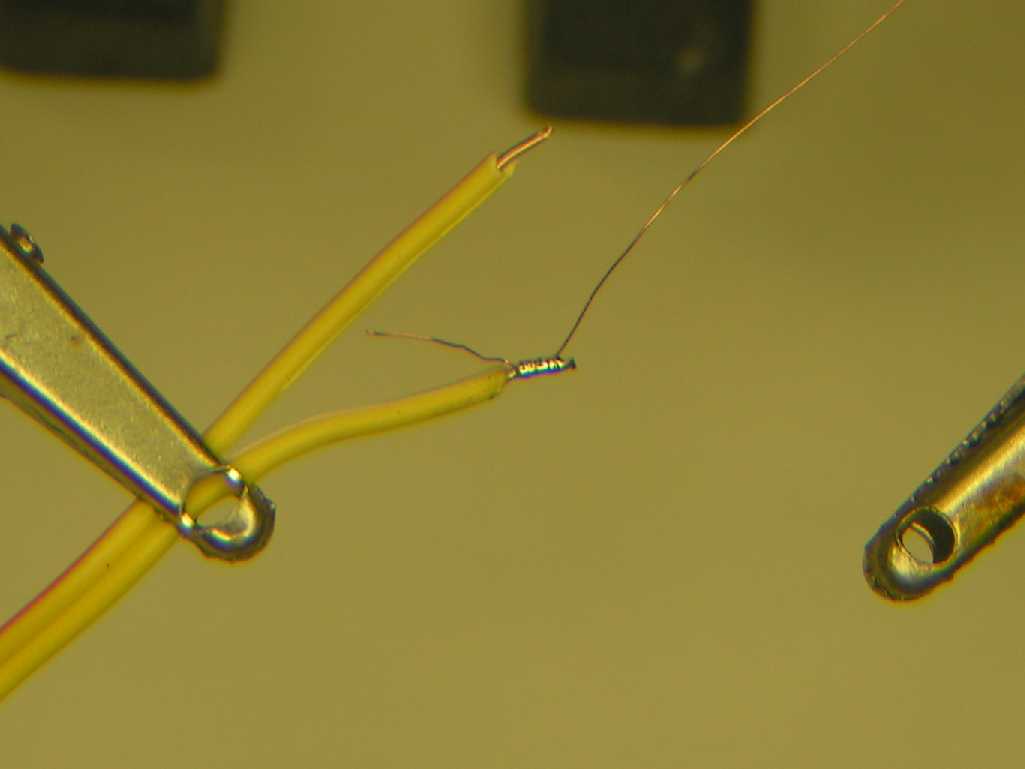
If you are
experienced at soldering and your insulation doesn't melt at soldering temperatures, you
can wrap both wires before soldering. My twisted pair wire melts so I have to solder
the short lead first. I can solder both at the same time on the shooters wire. Here
again, the long tail on the igniter wire that is necessary for hanging onto when wrapping
the first lead wire should be clipped off. |
| |
|
 |
Here is another
variation if you are experienced at soldering and have wire whose insulation doesn't melt
quickly. For a little added strength against breaking the bridge wire between the
two leads, wrap two or three wraps around the shorter lead where it is stripped and the
longer lead's insulation as shown. |
| |
|
|
 |
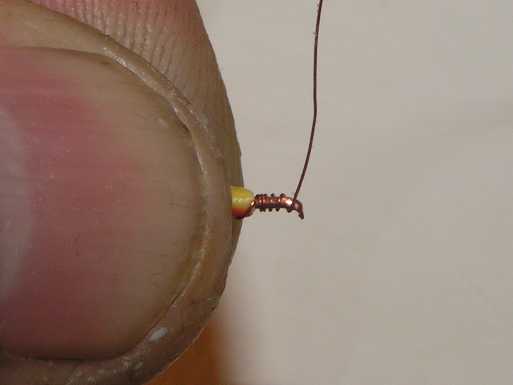
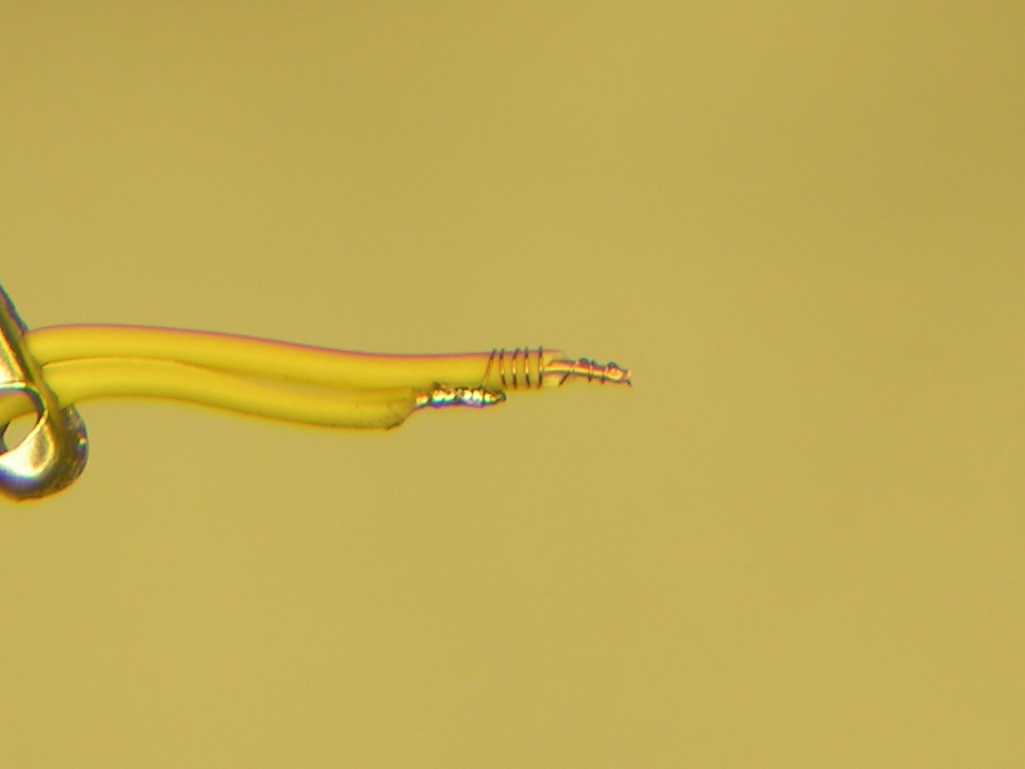
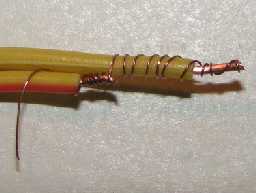
This is what it
looks like when both are soldered. This igniter is now ready for dipping into the
pyrogen and then it will be done.
|
| |
|
 |
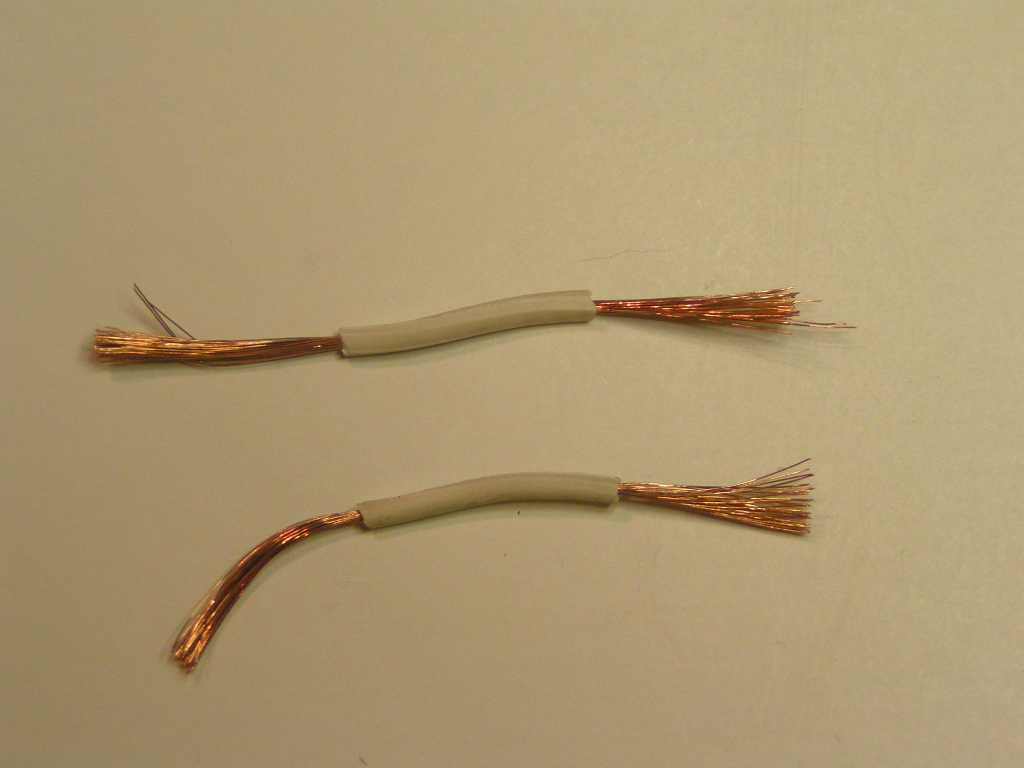
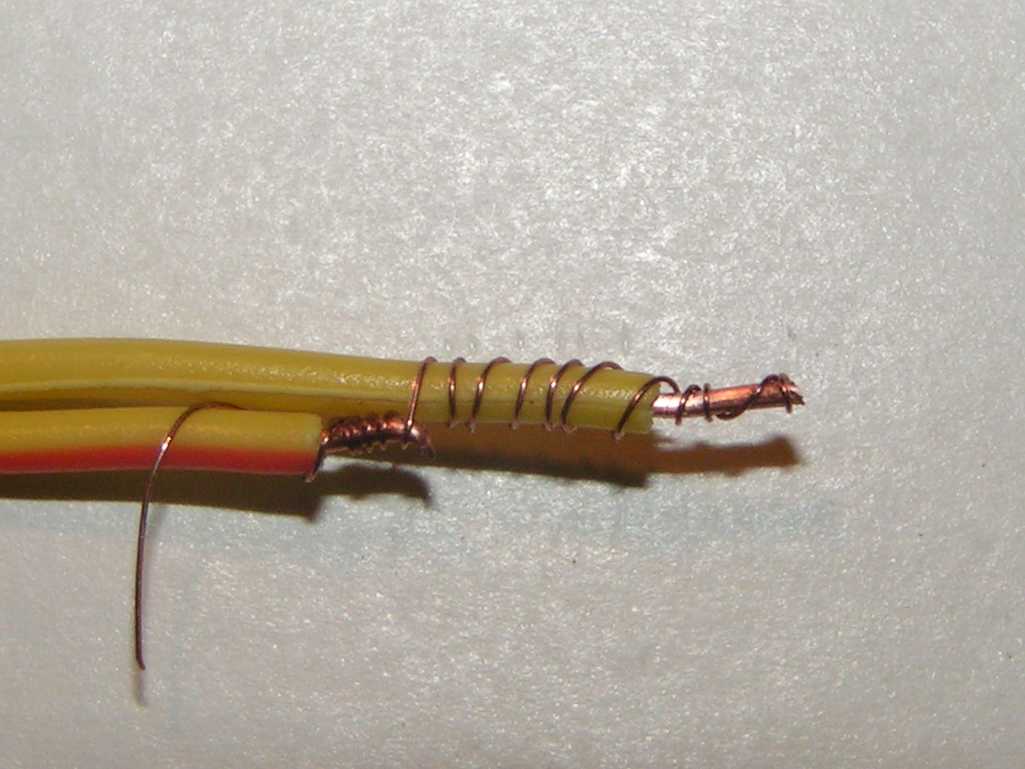
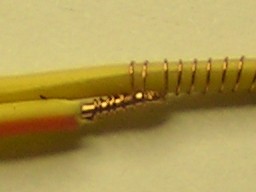
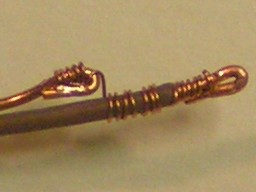
Here are the
three types of lead wires soldered. You can see not all my solder joints are
perfect. I got in a hurry on the center one. The left is the stranded teflon
coated wire out of the phone cord. The center is the twisted pair. The right
is the shooters wire. All are using copper wire. Notice the varying number of
wraps. When they are going to be used with a car battery, the number of wraps aren't
real important. |
| |
|
 |
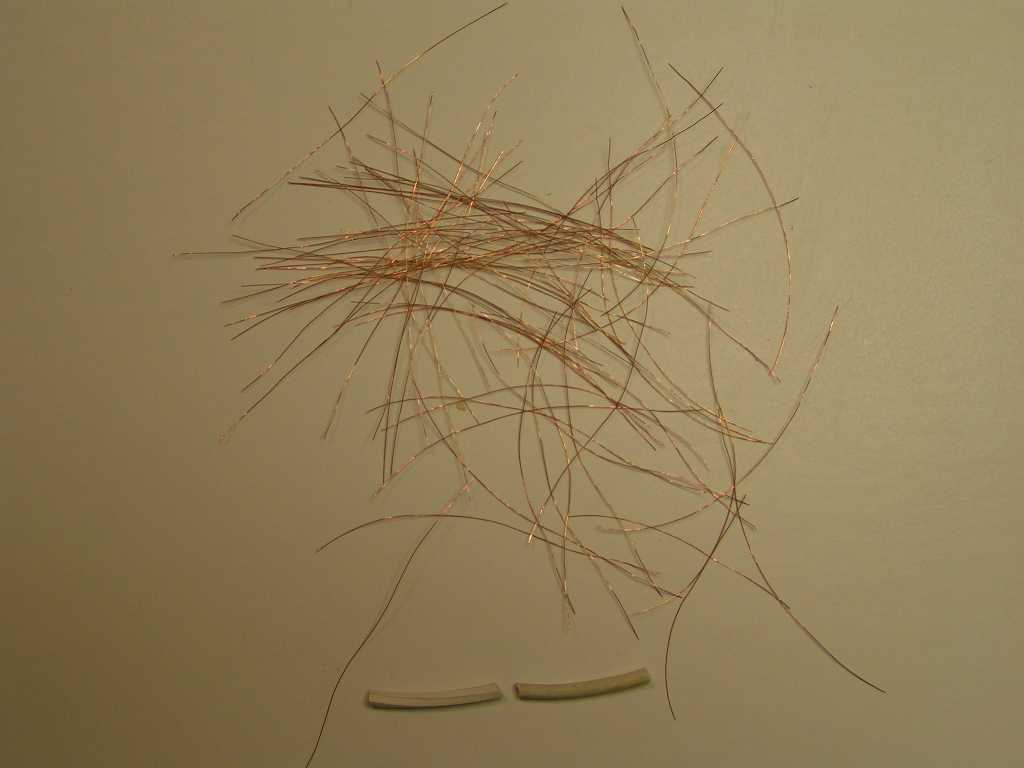
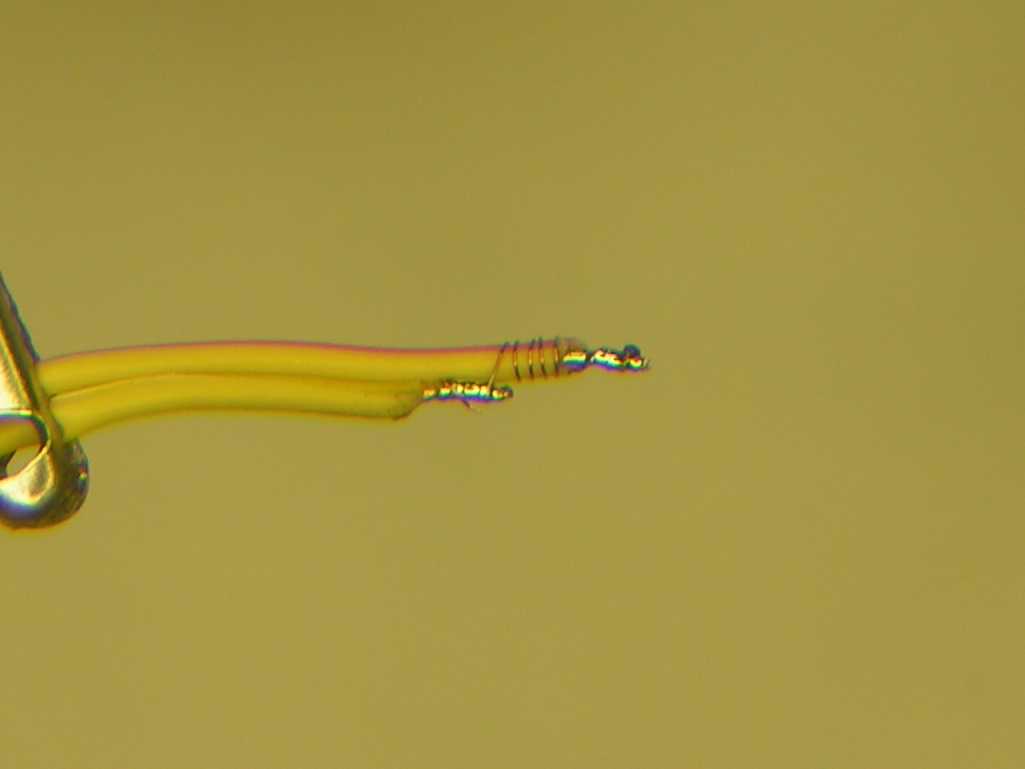
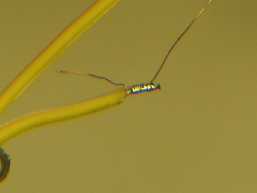
Here you see
the three types of wire mentioned. The top is the 39 gage copper wire from the lamp
cord. Center is the 40 gage nichrome wire. Bottom is the 40 gage stainless
steel ribbon. The center long lead has a little solder on the tip but should have
more solder. You can click on this picture for a larger version, as you can with any
of the pictures. Then you can see the difference better. Three to five turns
of the nichrome or stainless is about right. Also notice on the top wire that the
insulation has shrunk back away from the tip. This is one negative of this
particular wire -- it melts at a low temperature and you have to solder fast. It
always shrinks back a little. The shooters wire is great and has no negative
qualities. |
To Solder or Not to Solder
(Crimping)
That is the question.
Whether 'tis nobler in the mind to suffer The occasional misfires of outrageous fortune, Or to
solder and avoid a sea of troubles... (apologies to Bill Shakespeare). You can use a
wire wrapping tool and then just crimp the end of the lead wire
 over, or
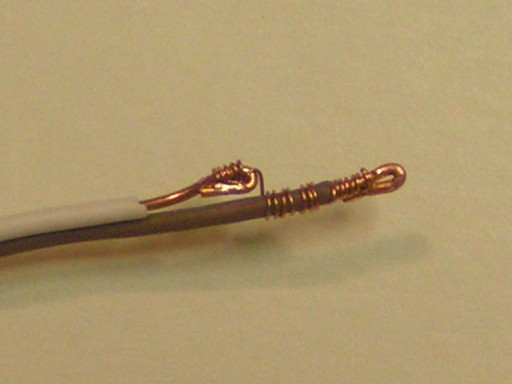
for that matter, hand wrap (as I did in this picture) and crimp the end of the lead wire over
instead of soldering. See Bill Ball's instructions
here. Personally, I
didn't find using the wirewrap tool to be that much better but if you are going to crimp, it
might make the overall process a little faster. If you absolutely cannot solder, then
this is okay but I wouldn't try it for an ejection charge igniter -- too much is at stake on
that end of the flight. If a motor igniter fails, you just replace it and try it again,
no big deal. With just a few minutes of practice (if you haven't soldered before), the
soldering goes very quickly and when you are done, you KNOW you have a good connection (as
long as you don't break the bridge wire between the two lead wires.) I think it is worth
the trouble to solder. Also, don't try this with stainless steel wire. This wire
is very springy and will not stay wrapped without solder but will just unwind itself. over, or
for that matter, hand wrap (as I did in this picture) and crimp the end of the lead wire over
instead of soldering. See Bill Ball's instructions
here. Personally, I
didn't find using the wirewrap tool to be that much better but if you are going to crimp, it
might make the overall process a little faster. If you absolutely cannot solder, then
this is okay but I wouldn't try it for an ejection charge igniter -- too much is at stake on
that end of the flight. If a motor igniter fails, you just replace it and try it again,
no big deal. With just a few minutes of practice (if you haven't soldered before), the
soldering goes very quickly and when you are done, you KNOW you have a good connection (as
long as you don't break the bridge wire between the two lead wires.) I think it is worth
the trouble to solder. Also, don't try this with stainless steel wire. This wire
is very springy and will not stay wrapped without solder but will just unwind itself.
Applying the Pyrogen
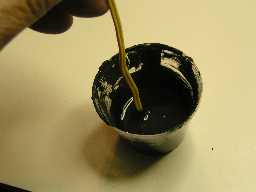 Once
you have the soldering done, you are home free. Coating the igniter with pyrogen is a
piece of cake. Just dip the igniter wire into the pyrogen making sure to cover it past
the bottom of the shorter lead, pull it out and set it aside to dry. If you need it
thicker, just dip it again. You don't want to keep dipping it until you get a huge ball
on because when it burns, it will basically explode the ball from the burning on the inside
and it may not all ignite. There are other things we can do to make a more robust
igniter out of the basic igniter. See the modifications
for larger motors section below. Once
you have the soldering done, you are home free. Coating the igniter with pyrogen is a
piece of cake. Just dip the igniter wire into the pyrogen making sure to cover it past
the bottom of the shorter lead, pull it out and set it aside to dry. If you need it
thicker, just dip it again. You don't want to keep dipping it until you get a huge ball
on because when it burns, it will basically explode the ball from the burning on the inside
and it may not all ignite. There are other things we can do to make a more robust
igniter out of the basic igniter. See the modifications
for larger motors section below.
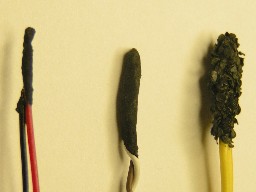
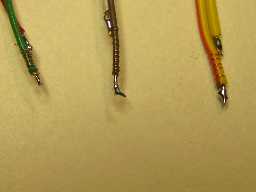
Here are three head sizes. The left and smallest would be
appropriate for the smallest nozzle. At its widest point, it is only 0.075" in diameter.
The center one is a more normal size igniter. The one on the right had an extra pyrogen
dip and then while still wet, it was rolled in grain powder (granular black powder).
This particular one is commercial 4x powder but it could be homemade powder also. The
size of the head after dipping is just dependant on how thin the pyrogen mix is and how many
times it is dipped.
Drying the Igniters
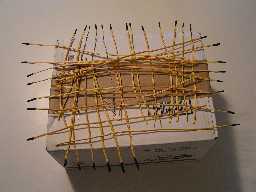 After
you have dipped the igniter and are happy with the coating, lay it out to dry. I just
put them on a box with the pyrogen out over the edge. I can get a large number by using
all four edges of the box. It doesn't take long to dry because the acetone evaporates
fast. Leave them for a couple of hours anyway, just to make sure they are dry all the
way through. After
you have dipped the igniter and are happy with the coating, lay it out to dry. I just
put them on a box with the pyrogen out over the edge. I can get a large number by using
all four edges of the box. It doesn't take long to dry because the acetone evaporates
fast. Leave them for a couple of hours anyway, just to make sure they are dry all the
way through.
Safety Short the Leads
 When
you are done with the igniter and ready to put it away, it is a good idea to strip the ends of
the leads opposite the pyrogen and twist them together. I strip about 1/2" back.
This is to make sure that the igniter cannot be fired accidentally until it is hooked and
ready to be used. This is especially a good idea for the low current igniters to prevent
static discharges from firing them. It is extremely unlikely this would occur but still
shorting the leads like this is a good idea. When
you are done with the igniter and ready to put it away, it is a good idea to strip the ends of
the leads opposite the pyrogen and twist them together. I strip about 1/2" back.
This is to make sure that the igniter cannot be fired accidentally until it is hooked and
ready to be used. This is especially a good idea for the low current igniters to prevent
static discharges from firing them. It is extremely unlikely this would occur but still
shorting the leads like this is a good idea.
Modifications for Larger Motors
There are a number of ways to get "more bang for the buck." For larger motors or harder
to ignite motors, these basic igniters can be enhanced by getting more ignition material,
either pyrogen, pyrolant, black powder, or fuel chunks to the igniter.
Mark
Canepa on page 86 of his book Modern High-Power Rocketry 2 shows slicing a piece
lengthwise out of a commercial propellant grain (Aerotech Blue Thunder) and attaching it to
the pyrogen end of the igniter with glue, wire, string or thread.
John
Wickman in his book How to Make Amateur Rockets 2nd Edition page 22-4 shows a diagram
of a "bag igniter." Just take some propellant chips and wrapping them up in a cheese
cloth bag around the regular igniter. His book is mainly about composite fuel --
ammonium perchlorate and ammonium nitrate -- so I assume his method uses bits of these type
propellants but bits of sugar fuel would work the same.
Another method that is normally discussed in conjunction with Christmas tree bulb igniters is
using black powder or other pyrogens in a plastic straw. This could also be used with a
regular igniter sealing the igniter in with hot melt glue (don't get it on the pyrogen of the
igniter). You have to be careful with this method because black powder burns so fast
that if you have too much for the size of motor or core volume, you could over pressurize the
motor and cause a CATO.
For
just a little more power, you can make your pyrogen head larger by dipping more than once.
You could also dip the igniter head in NC lacquer and then in some homemade black powder with
larger grain sizes or commercial black powder or smokeless powder.
There are as many methods of making igniters and methods of enhancing them for larger motors
as there are propellant and motor types. I will continue adding to this web page in the
future.
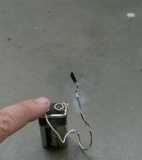
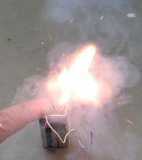
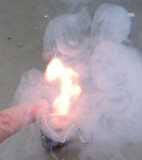
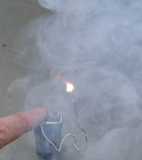
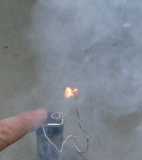
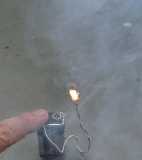
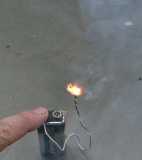
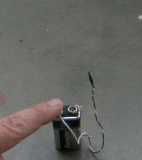
Firing a 9V Igniter
This sequence is showing a nichrome wire igniter being fired
using a 9 volt battery. The frames are 1/15th of a second apart. The entire
ignition burn takes place in 8/15ths of a second. One lead is wrapped around one
terminal, then the other lead is pressed against the other terminal to fire the igniter for
this demonstration. The large flash is the pyrogen immediately around the wound igniter
wire portion. It then continues to burn the pyrogen that is down further on the lead
wires.
Here is the video of this
igniter (3 seconds).
click here for mp4 (0.3 meg file)
click here for mpg (2 meg file)
Home ||
High Power Rocketry ||
Experimental Rocketry
|